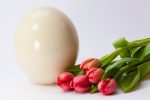
Ostriches are the flightless bird and among the largest bird ever. They have a rounded body with long legs and a long neck. We can find them in wild Africa, in habitats such as savannas. Besides their large body, they also know with their eggs, where it is the largest eggs of any living bird!
Ostrich eggs are about 6 inches in diameter and can weigh up to 1kg or more. They lay their eggs in a communal nest, which can hold about 60 eggs together, and hatch after around 42 days.
Just like chicken eggs, some people simply just cook it as a dish, some others make a craft from it! There are so many creative ideas for DIY projects from eggs shell. We can draw or paint on it, just like what we usually do for Easter! Since ostrich egg is the largest eggs that we can have, we can have enough area to paint or draw on the shell. They will look prettier in the display, too! Moreover, in this article, we will talk about the earliest step for egg crafts, which is how to clean the egg up!
Here are some simple guidelines for you if you need to use egg for your Do-It-Yourself creation!
How To Clean Up the Ostrich Egg for DIY Creation
In general, what you have to do to clean up out your egg is to knock through the bottom of the shell to make a small hole and remove the contents in it. But this is not really clean up the egg because the membrane inside of it remains. So, what do we do?
Here is the step you can follow:
1. Prepare the egg
On the top and bottom of the egg, score a circle of 1 inch in diameter with nail. Then, tap the nail through the circle with hammer. You can also use high-speed drill or Dremel to do this. Do it gently because we don’t want to break it more than our scored area! Remove away the small pieces until we have a quarter-sized hole, so we can blow out the contents in it from the shell. Make sure your opening holes are wide enough so when you blow on it, the egg’s contents can easily flow out.
2. Clean the eggshell up!
After you remove the contents like yolk and others (save it to make a sunny side up later, maybe?), rinse the inner of the shell, not only with lukewarm water but also bleach bath your egg to disinfect the surface for about ten to fifteen minutes. Then, gently extract the membrane from the egg. Don’t forget to make sure you cover the entire egg with the solution! This disinfecting process is important to kill the bacteria in your eggshell. Let it rest for about five to ten minutes, then you can rinse off the bleach with clean running water.
You can also wash the outer of the shell or roll it in white vinegar to remove the natural oils on it.
3. Nutralize the bleach from the egg
After that, we have to neutralize the bleach. To do this, you can place the egg in another container full with a half-gallon to a tablespoon of baking soda and water. Cover your egg with this solution, and let it rest for a few minutes before you rinse off the solution from the eggshell with clean running water again.
Finally, you can drain the eggshell in an egg carton or bowl. After dry, your eggshell is ready for you to use!
If you don’t have an idea for your egg craft project, here is some inspiration for you:
- Flower and succulents vase from egg
You can make a cute tiny vase for flower from eggshell. Empty the egg and glue it into a flat surface with candle wax, add some water and put a flower in it, and there you go! You can also use it to put your succulents by putting soil in it instead of water.
- Seed starter
Yes, not only as a decorative vase, but you can also use an eggshell as a medium for seed starter. You just have to fill you empty clean eggshell halfway with potting soil and carefully pack it. For one eggshell, you can place about 5 seeds onto your soil. Keep you eggs filled with soil and seeds in the egg carton, close to the sunlight. Provide them with a good amount of water.
- Mozaic picture or vase holder
This is a fun project! You can color your eggshell, and break them into mosaic pieces. Set it aside, and prepare your drawing! But now, instead of coloring it with crayon or paint, you color your drawing with the eggshell pieces! Get creative in where you put your pieces. You can’t get wrong with mosaic pieces, after all!
You can also do this to cover up your plain vase or toothbrush holder. Use a different color to make it more colorful!
- Paint a face for a display!
The easiest way to play with your eggshell is to draw on it, just like at Easter! You can draw a bunny, penguin, owl, chick…, or just anything! There is no limit for your creativity. After you outline the surface, you can paint them with decorative paint. Add another feature like wings or legs to make it more alive!
Don’t be too stressed out with your egg craft, though! No matter how good or bad your painting or crafting skill is, decorating an ostrich egg is something that you can enjoy! So, go get creative!
That’s all you need to do to clean up your ostrich egg for your DIY creation. It’s not that hard, isn’t it? But if think you don’t have time to clean up your ostrich egg, you can find clean, empty eggs for sale in many online or art supply local stores. You do you!

